The Journey

Mar 1, 2013

Carolina Pregnancy Center ~Sew-a-thon~

Girls Night Out- Sewing Style!

 
This is what I did on Friday night...along with 11 others (and a tiny baby)!
We had a Sew-a-thon for our local Carolina Pregnancy Center and made burp cloths for the Earn While You Learn Store.

Everyone had a job- ironing, cutting, pinning, sewing, or finishing. We had four sewers and eight "preppers." The wheels moved a little slow at the beginning, but by the end of the two hours, we were turning out some burp cloths!

This is what sewing is to me...using my talent for someone else's benefit! The moms who come to CPC come from all walks of life- all ages- all colors- all situations. Moms earn "Mommy Money" to spend in the Earn While You Learn Store by attending classes, staying in school, making doctor appointments, and going to church. Donating these burp cloths will add to the wonderful things already available to the moms in the store.

By the end of two hours, we had 31 completely finished burp cloths and at least 20 more that are cut, pinned, and ready to be sewn. We used five yards of chenille!

Rebekah, Laura, Stacey, me, my mom, Sharon, Kendra, Renee, and Meghan. Not pictured: Eden, Tarah, Amanda, and Emily
We used Dana's burp cloth tutorial- it's super easy, but sometimes it's nice to read it for yourself.
You can check out Carolina Pregnancy Center's website here.

Til next time!
God bless,
braxton

Feb 21, 2013

Am I back?

I don't even know where to start... do I even remember how to blog?!
What font did I use?

Yeh, it's been awhile. I know I can look and find the date of my last post, but I don't want to.

I have good reasons, though...

As 2012 dawned, "just call me braxton" had become my new dimension of crafting. Crafting has always evolved for me, and blogging was a great, next step. I wanted to show others how to sew and craft...I had learned from others and wanted to pass on the knowledge.


At the time, I had a small shop, FISHandLOAVES.etsy.com. I mostly sold my inventory at local craft sales, but I had a few things online. After a local sale in March, I looked at the table and decided to go home and put it all online. And I did. My shop went from having less than ten items to over forty in a day.

Beginning April 12, 2012, I had an order or sold an item every.single.day for a month and a half. It was amazing and such a blessing! I made more money in a month than I had made the entire previous year.

Since that day, I've been sewing over two hours almost every day. Keeping up with orders and keeping my inventory up on etsy has occupied my time. Blogging fell to the wayside. There's always something to sew...and then when I think about blogging, I can't seem to remember all the bits and pieces...how do I make a link to the tutorial page again?

I might be back- there are tutorials I would love to post. Peasant dresses, car seat canopies, little boy ties...but it's not like there aren't a million out there! I learned to sew from blogs- great blogs- and they are still out there. Maybe I'll join the ranks one day.

I think I'll stick with etsy for this season, though.

By the way, wanna check out what I make? Here's the shop: www.FISHandLOAVES.etsy.com
(ha! I remembered how to make a link! Yes!)

To Him be the glory,
braxton

Mar 25, 2012

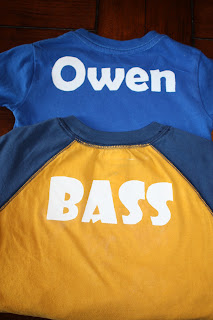
Permanent Fabric Paint Stenciling

I first saw how do this here. I've been stenciling ever since!
Gather your materials:
*Plain article of clothing: t-shirt, pants, onesie, dress, etc. When I find them at Target or Wal-Mart, I buy several colors in several sizes and hold onto them for the next birthday. 100% cotton is best.
*Reynolds Freezer Paper- I found mine at Wal-Mart on the aisle with plastic, aluminum foil, and wax paper. It's a HUGE roll that will last me a decade! It has paper on one side and plastic on the other. There are a ton of uses for this product, but I'll stick with stenciling for now!
*Tulip Soft permanent fabric paint- matte or glitter. You can find it at any craft store. (Ask someone for help if you can't find it! They put it in weird places sometimes.) I have white, blue, purple, and silver glitter. I buy shirts that will coordinate well with the colors of paint that I have.
*fun stencil...more on this in a second
*exacto knife
*good cutting surface
*foam brush
*iron

Ok, decide what you'd like to stencil. Names are an easy pick. I also like dinosaurs and animals for little boys. Flowers for girls. Literally, your choices are infinite. Search "coloring page" with the item, and you'll find easy-to-cut-out images on google. Find images that are s.i.m.p.le.- you don't want to be cutting all day!
Print out the name or image and make sure it's a good fit for your article of clothing!
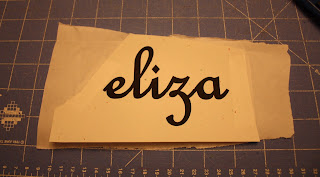
This was the latest stencil that I did- name shirt for Eliza's birthday.
Cut out a piece of Freezer Paper that is a little bigger than your image and tape the image to the top of the paper. Make sure the plastic side is DOWN.
Carefully cut out the image. The goal is to have a perfect NEGATIVE image- the stencil.
**Keep the insides of letters like e,d, a, p, b, etc. You'll need these later!
The stencil is ready!
Place the freezer paper stencil on top of the shirt where you want it.
Warm up your iron and carefully press the stencil and adhere it to the shirt. The plastic side of the paper will adhere to the cotton.
**Check the directions on the Freezer Paper box and adjust the temperature of your iron accordingly. I have had my iron too hot and turned the paper brown. You want a good seal so the paint won't leak under the stencil- but you don't want to burn the paper!
Don't forget to adhere the "insides" of the letters during this step!
Check the edges of the stencil, and make sure there's a good seal.
Time to paint! Using a foam brush, apply little amounts of paint at a time. DAB is a good word.
Let the first coat dry and reapply.
Once the paint is dry- and ONLY once it's dry- remove the stencil.
Last step, place a piece of scrap material on top of the stencil or turn the shirt over and iron it.
You want to "set" the paint. (I always read the directions on the bottle to remind myself what to do.)
Nevertheless, your creative, original gift is done!

Fold it, wrap it up, give it away...and go make another one (or two or three)!


Happy making and giving,
braxton


~Crib Sheet Tutorial~

This tutorial is for beginners! Making a crib sheet will possibly be the easiest thing you'll ever make- well, maybe not, but it'll be close!
Go buy 2 1/4 yards of adorable fabric, a package of 1/4" elastic (I use knit elastic, but it doesn't matter what kind), and you're ready to go! You'll need 61" of total elastic (1yd+25").

**WASH, DRY, AND PRESS your fabric. Do not skip this step! You don't want your sheet to shrink once you've made it...it might not fit!
Cut your fabric so it is 44" x 68". I like folding my fabric into quarters (so it is doubled both ways) and making cuts at 22" and 34". It's a lot easier to handle this way.
Then, carefully cut 8.5" x 8.5" out of the corners (already shown in the picture above). I do this at the same time when the fabric is still doubled up. 
Your fabric should now look something like this- a large piece with four corners cut out.
Now, you're ready to sew!
Match up each corner, and pin the good sides facing.
 Stitch down each corner. I use 3/8th seam allowance. Reverse or lock stitch at the beginning of each line to secure your stitches.
You should have four "pockets" that look like this on each corner.
 At this point, you have a few options:
1) serge each corner- makes for a professional look
2) if you don't have a serger, you can zigzag down the raw edges to keep them from fraying
3) or you can leave them raw. If the sheet is for your little one, and it doesn't matter if there is frayed fabric on the inside of your corners or not, then go on to the next step.
Now, it's time to prep the border of the sheet for the elastic casing.
I serge around the entire border of the sheet...very close to the edge. I don't want to lose much fabric in this step.
If you don't have a serger, you'll want to turn down 1/8th-1/4th" and then turn down 1/8th-1/4th" again to hide the raw edge. Try not to lose too much fabric on this step. Stitch around the entire border.

You can see in the pictures above that the entire border is serged, and the corners lay down nicely.
Ready to make the casing for the elastic!
I like to use a paper clip to feed the elastic through the casing, but many tutorials suggest a safety pin. I have pulled the head off of several safety pins and have ditched them ever since.
Using the paper clip as a guide, I turn the border under and pin all the way around the sheet. I want to make sure that the clip will fit through the casing, and I want the casing as narrow as possible.
Make sure to leave an opening in the middle of one side of your sheet. I "double pin" the beginning and end of the opening so I don't forget to stop. Reverse stitch at the beginning and end. I stitch right on top of on serge stitches...very close to the edge.
You can barely see where I stitch...it's right on top of the serge stitches. Makes for a clean look.
Cut 61" of elastic- 1 yd + 25"
The first time I made a sheet, I fed the whole 3 yds through the casing, and then pulled and pulled until there was a custom fit to the mattress. This ended up being 61". You can custom fit your sheet if you want.
Begin to feed the elastic through the casing. TIP: pin the END of the elastic near the opening. You can easily pull the end through the casing and not even know it!
Once you get back to the opening, overlap the ends of the elastic and zigzag on top of them to secure them.

Time to close the opening. I like to stitch looking at the GOOD side of the fabric. Reverse stitch at the beginning and end of the opening.
All done!

Go try it on your mattress for a perfect fit!

Wasn't that easy?! Go make another!

Happy making and giving!
God bless,
braxton

Jan 26, 2012

How to Applique- simple and adorable

There are three babies coming into the world soon- Silas (arrived yesterday!), Janie, and Michael.
It was time to get a few onesies ready!

I have been doing simple letter appliques since I started sewing baby things. I've learned a couple of tricks along the way...let me share them with you-

What you'll need:
*onesies (3-6m size are best)
*scraps of fabric
*Wonder-Under 
*Pellon lightweight fusible interfacing

Here's some explanation on Wonder-Under and fusible interfacing... two great products needed for appliqueing!

1) Wonder-Under- this is a particular type of interfacing. It has paper backing with fusible webbing on the other side. (You can also buy it on a roll- I think it's 1/2 inch wide.) It's on the top left in the picture below (the paper backing has come off). You will cut it into tiny pieces and put it in between your letter and the fabric. By pressing with an iron, you will melt the webbing and fuse your applique to the fabric. It helps keep the letter in place while you stitch it down.

2) Light weight fusible interfacing- usually Pellon brand (seen in the top right)
This interfacing is thicker. One side is smooth and the other is rough because it has dry "glue" in dots. This interfacing is applied UNDER the fabric to give the knit more stability. It fuses to the fabric when pressed with heat as well. (You'll want to make sure the rough side is touching the fabric so it will fuse to it.) Without it, your knit onesie will pull and stretch and drive.you.crazy! I think of it as "stabilizer fabric."

You should be able to find these products very close to each other in your local fabric store.

Ok, so once you have your "special products," you're ready to make something special!

For some reason, I am a sucker for buying white onesies. I always find them on clearance at TJ Maxx or Ross, and I stash them away for the next baby shower. I like 3-6 month size for newborns and 12-18 month size for one-year-old birthdays.

Because I used to teach kindergarten, I have diecuts of each letter- capital and lowercase. You can easily make your own letters on Word or print them from the internet. I sometimes draw the letters myself or find a fun font. This time, I wanted plain, simple letters. Carefully cut out your letter from your scrap fabric.


Next, you'll want to cut out a piece of fusible interfacing about 1/2 inch larger than your letter.
*Make sure the ROUGH side is facing UP.
Turn the onesie inside out and center the interfacing 1/2 inch below the collar. Make sure you don't see a tag! (You want to be on the backside of the FRONT panel of the onesie.) Place the ROUGH side on the onesie- you want the glue to adhere to the fabric, NOT your iron! Once it's centered, press it with a medium-heat iron. It takes about 30 seconds. Make sure all the edges have "fused" to the onesie.
Time to fuse your letter to the onesie. I cut the Wonder-Under into tiny strips.
Make sure that the letter is on top of the interfacing that you ironed underneath the onesie. There should be a 1/2 inch border around the entire letter. Then, cut the Wonder-Under apart and carefully slide each piece between the letter and the onesie.
Now that the Wonder-Under is under your letter, carefully press with an iron to melt the webbing. Check to make sure that the letter is "stuck" to the onesie. If not, reapply heat until it's completely stuck. You don't want the letter moving around while you are trying to stitch it down!
Choose a neutral, matching color for your thread. For the "m," I used a dark brown. The "s" and "j" got off white. You don't want to draw attention to the zigzag stitches. You simply want the stitches to accent a colorful letter.
The zigzag stitch on my machine defaults to 5.0 width and 2.0 length. Use a scrap piece of fabric and play with the settings until you find one that you like. 3.8 width and 0.8 length were my picks this time. 4.0 and 0.9 are the highest settings I've used in the past for this application.
I slide the extra piece off the machine in order to get a little more room to maneuver the onesie around.
Take it slow. In the curves, leave the needle in the fabric every few stitches and turn it.
Make sure no extra fabric gets under the needle! Sometimes it's a tight fit, just take your time.

One last touch. I take the stitches out of the side seam and insert my tag. I stitch it in and then serge the excess off.
There it is!
And, they're done! Ready to put on a tiny miracle!
Even though I love doing onesies... I've done more bibs! It seems the cute onesies eventually get covered with a store-bought bib which drives me a little crazy :)
So, I applique bibs...because they are ALWAYS on the top!
Here's to days with no bibs!

Happy making and giving,
braxton