The Journey

Jan 10, 2012

T-shirt Necklaces

Revised post- I had a lot of questions and comments after posting the original "tutorial." I'm adding more pictures and a little more clarification on certain points for those of you who want the "nitty gritty!" Here goes~

This ended up being my "handmade-with-love" Christmas gift this year. Once I made one, I made a dozen. My husband's t-shirt drawer and Old Navy were my best friends when it came to colorful, affordable t-shirts!


Seriously, this is an easy, no sew project! You need a shirt, a ruler, and some scissors.
I couldn't make just one, and I hope you can't either!

How to pick your shirts-
Solid and bright colors are the best picks because these are going to accent your outfits- but white, gray, and brown can go a long way and match a variety of outfits. A tie-dye is great if you can get your hands on one!
Also, try to find shirts with NO side seams. If they are there, it's okay, but you will have less options on how you want to wear it. Side seam shirts are just fine- if it's a great color, do it!

Gather all your materials:
*shirt
*scissors (or rotary cutter if you have one)
*a yard stick or ruler
*cutting mat, if possible

Ready, set, go-
-Lay the shirt flat on the cutting mat or table.
-Cut the hem off.
-Working from the bottom of the shirt to the armpits, make cuts every 3/4ths inch up to 1.5 inches parallel to the bottom of the shirt. You are basically cutting your shirt into thin circles.
-You can vary the widths in your necklace or make them all the same. I did both and liked the different looks. Most of my loops were one inch thick.
Now, the fun part!
You are going to take each loop of fabric and pull it until the knit loops up on itself and turns into a rolled, long loop of knit.(about 1/8th" thick now)
Let me add a side note- I ran into a crazy shirt that did NOT roll up into a loop once I pulled it. The loops stretched...but never rolled. I don't know why and never tried too hard to find out because I loved the look. I've worn it more than any of my others! If you get a "lemon," just work with it!
The loops are still about 1" thick. Crazy, but I love it!
*NOTE: If you have side seams, you'll need to hold the seams as you stretch each strip. (You can pull the stitches apart if you're not holding onto them). As you pull, twist the loop (once or twice) and stack the two seams in your hand so you can hide them later. This is why no-side-seam shirts are best- you don't have to hide the seams. If you pull a seam apart by accident, simply tie the ends together- you'll hide it later anyway.
Next is the "creative" part. Decide how many loops you want in each necklace. Mine were 8-15 loops each. Keep in mind that you will wrap the loops around your neck twice...so it will become twice as thick. (Mine were 16-30 thick once "arranged" on my neck.) You should be able to get about 15 cuts from each shirt...so, one shirt can make two necklaces if you use 7-8 per necklace. Sometimes I used 12 loops and just threw the extra loops away... or paired them with another set of loops for a multi-colored look.
Wrap it around your neck twice for a shorter, thicker necklace
No-seam necklaces are LONG!
Decide if you want to twist several strands together, twist the whole thing, leave it simple, braid some, etc. If you are going to braid, go ahead and cut 3 of your loops to make long lines. Braid them together and then tie the ends to each other. You will hide these knots in the next step.

Let's finish it out!
Cut one more piece of 1" shirt and wrap it around all the "stacked" seams til they are all covered.
Tie a nice knot and tuck in the end pieces.You can stretch this piece as well or leave it wide.

 Give it away...then, go make yourself one!

Coloring Book and Crayon Tote

Time to make a four-year olds birthday present! She will be flying a L.O.N.G. way very soon, so I figured a coloring book tote could come in handy.
folded, it measures 12 wide x 9.5 tall
Let's get to it-
Find a cotton print that you love and a solid to match it. I went with the solid black because crayons tend to color, and the crayon rolls I have done in the past have gotten pretty colorful- pretty quickly. 
1 outside and 1 inside piece


Cut inside and outside pieces
*1 solid 13x20
*1 print 13x20

Cut crayon pocket(s)
*print 13x6 (you will fold this to a 13x3 pocket)- you can choose to make one or two pockets for the crayons

Cut book pockets
*1 solid 13x8
*1 print 13x6

Cut straps
*2 solid 13x3 pieces (you will fold these to make 13x1.5 straps)


These are your inside pieces- crayon pockets, book pockets, and straps


As you can see on the outside piece, I'm using a print that has obvious orientation to it. I went ahead and cut it in half. I flipped one piece around and sewed the bottoms together. Now when the tote is closed, the owls will face UP on both sides! You will not have to do this with 90% of the prints you'll find.

Let's prep the pockets and straps-
Fold the top of the coloring book pockets down 1/2 inch, iron, and topstitch.

Fold the crayon pockets in half with good sides facing, pin, and sew. (I didn't use pins because my fabric tends to stay together...if you're a beginner, pin everything!)
Fold the strap pieces in half with good sides facing, pin, and sew. **Tip: because they are so thin, leave LONG threads at one end to help turn them right side out- I'll show you how it works in a sec.


leave long threads at one end
 Iron the seams flat- it makes a HUGE difference once you turn them right side out and iron them flat!
Here's a great trick that took me a long time to learn- when you are trying to turn narrow strips of material right side out, make sure you leave long threads at one end. If you forgot, you can go back and stitch a few inches with long threads now. Take a paper clip and wrap the strings around it- a lot! Slip the paper clip through the "tunnel" of fabric and slowly pull the fabric through the tunnel. You can use scissors to help push it through, but be careful- push too hard and the scissors will make a nice hole in your fabric!
The crayon pockets should be wide enough to push through and turn right side out easily.
Now, iron everything. Pocket and strap prep is done!

Time to add velcro. I used 7inches. I attached the soft side to the top of the solid lining piece and the rough side to the owl pocket that will be on the bottom of the tote. They were centered and placed about one inch away from the edge.

Now it's time to attach the crayon pocket(s). I found the middle of the lining piece and pinned one of the pockets about 1/2 an inch above the middle line. For the slots, I marked (with pins) every 2 inches across the pocket. You can make your crayon slots 1, 1.5, or 2in wide. My past experience with crayon rolls has convinced me that bigger slots are better for younger users.
Stitch the bottom of the pocket about 1/8th of an inch from the bottom. Stitch vertical lines every 2 inches (where you've marked with pins) and don't forget to backstitch at the beginning and end of each little line.
I decided to put another pocket above the crayon pocket but simply stitch the bottom. It is a long, shallow pocket that can be used for anything...or nothing.

Attached crayon pockets- the top one is only stitched along the bottom.
The bottom one is stitched along the bottom AND has vertical lines every 2 inches.
We're on the home stretch!
Lay your handles facing toward the middle of the tote and pin them 3 inches from each side. You'll need to go ahead and stack the big book pockets at the bottom (they are not attached to the lining yet). Pin all the layers together! Make sure there is only one "twist" in the handles. I go ahead and stitch them to the lining...gives them more stability and doesn't allow for movement when you're stitching the whole thing together.

Ok, time to assemble all the pieces and stitch everything together. Keep everything like it is (pictured above)- simply lay the outer, printed piece on top of everything (face down). I like to pin all the corners first, then the middle of each side, and then fill in from there. It's a good idea to mark a 4 inch opening on one side with double pins. That way, you won't forget to leave an opening to turn the tote through!
If you have a tag, insert it now- facing in.

Stitch all the way around- backstitching at the beginning and ending of the opening you are leaving. (This gives stability to the stitches as you CAREFULLY pull the piece right side out.) Clip all the corners before turning right side out.

My fingers show the opening that I left on one side.


Carefully push each corner out, and iron the tote. One last topstitch ALL the way around (make sure to close your opening), and you're done! Stuff with crayon books, sticker sheets, and crayons. My 2 inch slots allowed for 3 crayons to sit together.

Find someone to give it to...and give it away!
One last word- the book side ended up being very sturdy and rigid because of the book. The crayon side was a little flimsy. Interfacing could be added to this side or a small piece of cardboard could be inserted before doing the final stitch. All in all, I love the way it turned out!

Happy Birthday, Esther!

Dec 10, 2011

Glass Etching- a way to monogram your Pyrex


I had this ingenius idea about two years ago that someone should invent monogramming for Pyrex... for all the newlyweds in the world who wanted their cute initials or name on their glassware. Seriously, I see EVERYTHING monogrammed these days- why not Pyrex?! I saw an even greater need as we started feeding our friends after they delivered. They would have stacks of Pyrex to give back and sometimes didn't know whose was whose. Sticky notes ended up being the solution.

And then Pinterest came along! And one day as I looked through pins, I saw it! "Glass Etching for Pyrex," and I went shopping the next day! No more sticky notes, people! This is the real deal!

I have etched five of my own and have worked out the kinks. I'm doing some for a friend who's giving them as Christmas gifts and will take you through the process. Here goes!
First thing, you'll have to go shopping and probably scrummage through your craft drawers for random items. But $15 should get you started.


You'll need:
* "Armour Etch"- glass etching cream. I got 3 oz at Hobby Lobby for $9. (You can find it all over the internet and in various amounts.) I had to ask where to find it, but a nice gentleman took me straight to it. This stuff is SERIOUS! Be very careful handling it, washing it off, and having children around. It burns glass- enough said!
* Adhesive vinyl-  I also had to ask where to find it at Hobby Lobby, but they had plenty. Color does not matter. My roll is 9" wide by 10 feet. I have enough to do 100 dishes- give or take a few. There's a grid on the back which makes cutting very easy!
* small exacto knife- if you don't have one of those awesome machines that will cut the vinyl for you (I don't), you will be cutting your letters by hand. The smaller the blade, the more precise the cuts.
* cutting mat or board- do not take for granted that you need one! (My kitchen island has several outlines of letters from a time when I wasn't thinking clearly!) I use my Rotary Cutting Mat (17" x 23") for all my sewing cuts. If you want to start sewing...go get one!
* new foam brush- I have a huge pack of them in my craft drawer because they are cheap, and I use them for all sorts of stuff! When you get done with it, THROW IT AWAY! Etching cream is no joke! (have I said that already?)
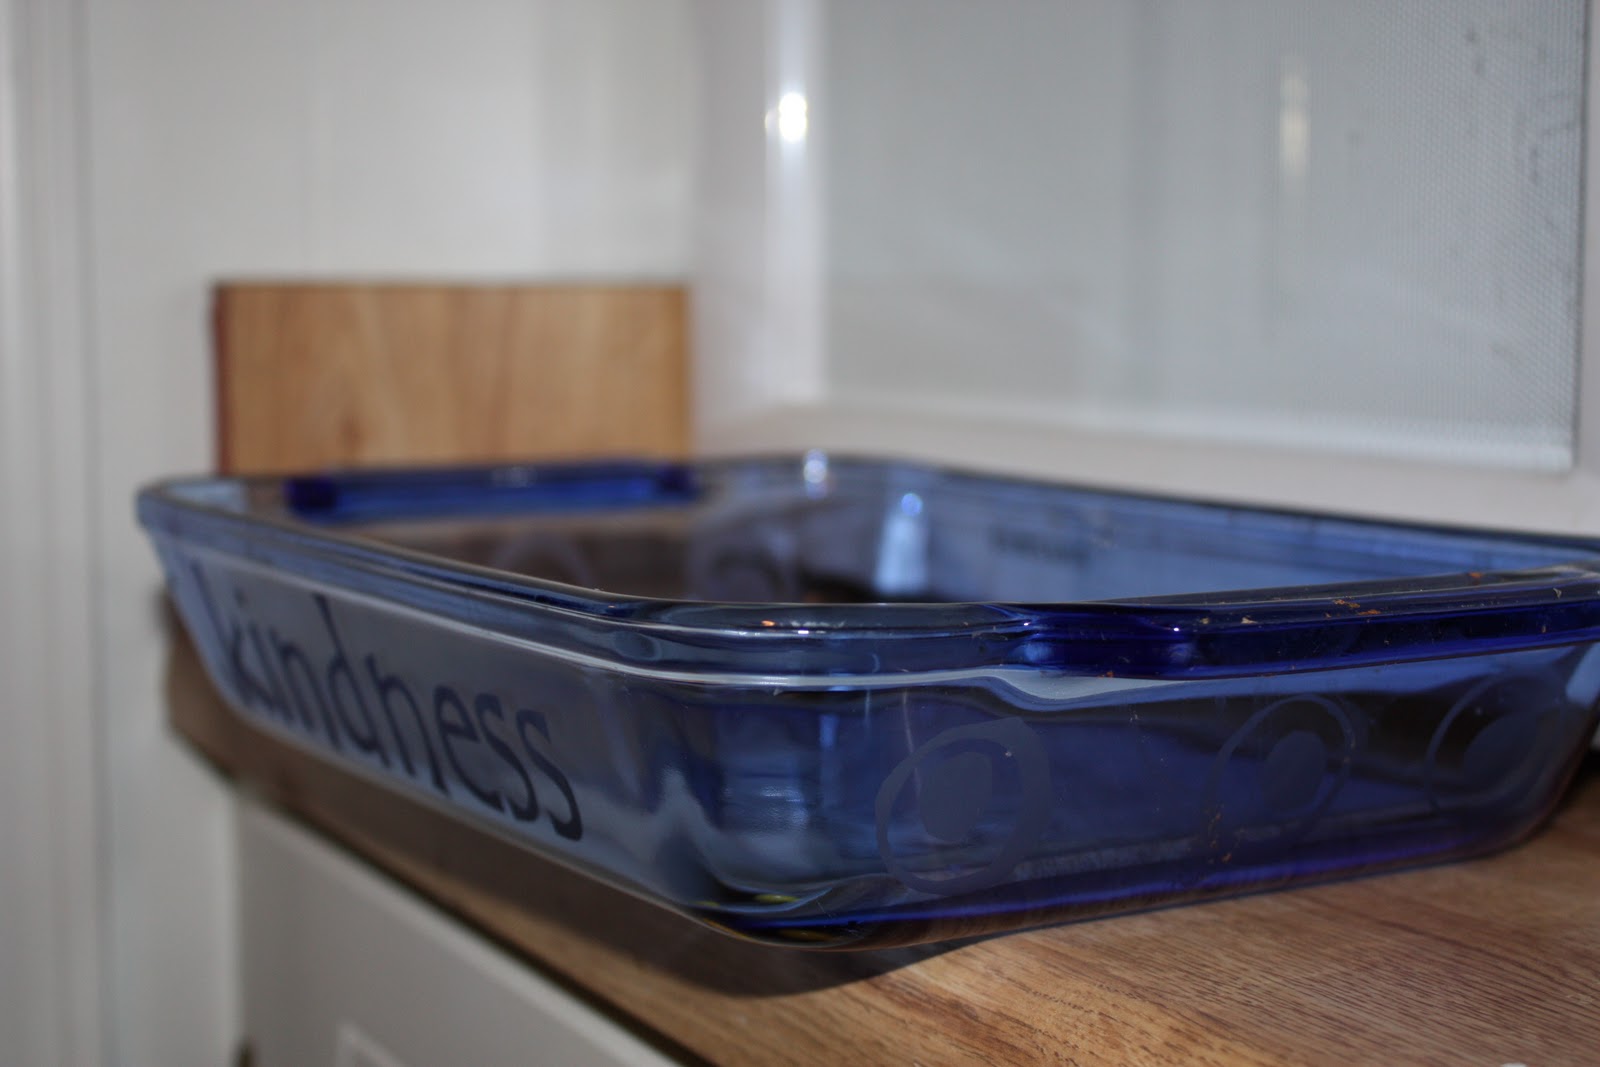
* any size Pyrex- I have etched onto clear and blue Pyrex...flat and round ones. The dishes I will be working on for this project are 8.5x7x2"tall and a 9x13x2" tall.
Once you have all your materials, you're ready to decide what you want to etch. I etched my last name on the first dish I did- and then decided it would get a little boring if all I saw was my name. I decided to use "faith" and "blessings" plus the fruit of the spirit- love, joy, peace, patience, kindness, goodness, gentleness, and self-control along with some free hand circles.
Find a font that you like and make sure it is big- but not bigger than 1.75" tall when printed. I used Tempus Sans font at 140 or 120.

Cut a strip of vinyl 2.5in tall (6 little squares if you look on the back), and tape your word on top of the vinyl.

Carefully, begin to cut out your letters. You are cutting through 3 layers- paper, vinyl, and paper backing, so use slow, heavy cuts. Take your time and be precise. You want a perfect NEGATIVE image when you are done. (You will throw the letters away- the SPACE is what you want.)
You can tell the "dot" on my i is off- but tempus sans puts it at a funny place to me.
Anyway, when you are done cutting, take all the letters out and you are left with your stencil.
**Don't lose the "inner" parts to letters like e and a. You will need them!**
Now, you are ready to center your stencil and carefully adhere to it the glass. There is paper that you can buy to help transfer it once you take the paper backing off. You can also use contact paper. I've done it without both- it just takes a little more patience.

I start from the center and adhere from center to each end.


Then, looking from the other side of the glass, I use the black, smooth side of my knife and carefully push down the vinyl around each letter. You want a perfect seal so the etching cream won't seap through.

**This is a good place to stop if you need to...or go ahead and print, cut, and seal another dish that you want to etch. Once you put the cream on, you will need to wait a good 20 minutes and then wash it off and clean up the sink and brushes. I will cut and seal all four dishes. Tomorrow, I will put the cream on. I will waste less cream doing them at the same time.***

Whenever you have cut and sealed all the dishes you want to do, you'll want to find a way for your dishes to stand UP while they are being etched with the cream. I use a highchair for the small ones and smush the big ones between a shelf and my sewing machine. A chair that leans back will also work. Figure this out before you put the cream on.


At this point, make sure you have about 30 minutes of uninterrupted time. Apply the cream using a foam brush. I "blot" the cream on instead of "brushing" it on. Make sure EVERY bit of the space you want etched is covered. Go up and down and side to side if you need to. *Be careful to not get any cream outside of the vinyl area! Wipe off with a cloth immediately if you do.* And, please be careful with the cream. The bottle says to use gloves and apply in a well-ventilated area. I'm not this careful, but I wash my hands THOROUGHLY after applying and washing it off the dishes. This stuff is dangerous!

I check back after 10 minutes and make sure there aren't any spots that I missed. I missed a few spots on the first dish I ever did, and I can tell. So, double checking is a good idea. Once all cream is on, set a timer for 20 minutes. (I was doing 5 dishes at once so I did the first three, set the timer, and then waited 10 minutes to start the other two. I wanted to have enough time to wash dishes before the second set were done.) I rinse the brush after applying and leave it on a papertowel next to the sink because I use it to wash off the cream. It is then thrown in the trash!


Once the timer beeps, I take the trash can to the sink (for the vinyl) and scrape the cream off with the foam brush under running water. I continue to let the water run over the dish as I take the vinyl off. Immediately throw the vinyl in the trash.
 Use soap and water, and wash the entire dish to make sure all the cream is off. I wash my hands AND the sink thoroughly, too. (Pretty sure some cream etched my sink during my first etching experience!)

Take a picture and post it on Facebook to show all your friends what you can do!
(Link to this tutorial so they can do theirs, too!)


 Happy making and giving!
-braxton


Dec 9, 2011

The Dirty Bag- an essential for any diaper bag!

Let me introduce you to the Dirty Bag!
And, please let me teach you how to make one!

The Dirty Bag is a basic drawstring bag...with a twist! My bag is made from PUL fabric. PUL fabric is used to make cloth diapers and is fabric laminated with a waterproof backing. You can find it at specialty fabric stores, and I know Hobby Lobby and Jo-Ann Fabrics have just started selling it as well. There are solid colors to choose from as well as prints. (approx $12/yard)

The first Dirty Bag I made was from a used diaper pail liner. I cut a rectangle from the bottom corner, closed the last side, made a casing, inserted a ribbon, and I had a waterproof bag to hold soiled cloth diapers in my diaper bag. I made three more the next day and gave two away! The mom I gave them to didn't use cloth diapers. She wanted a bag to keep dirty bibs, spat-on burp cloths, and soiled underwear in from her toddler! My bags have held all of these things as well as wet bathing suits and "blow-out" outfits. The uses are endless!

That is why this has become my go-to baby shower gift! EVERY mom needs at least one of these! I know it will be used from birth to age...5? at least :)

So, Elizabeth, after having three boys, you are finally getting a Dirty Bag for your fourth! It's about time!

Let's get to it~
You'll need half a yard of fabric. Obviously, I recommend PUL fabric, but if you don't need a waterproof bag, cotton will do the job.
1) This bag was cut 12"x16"... cut whatever size you want. 14"x16" gives you a wider, more squared bag...just "eye" the fabric and find the size you want.
Cut two pieces the same size
The shorter side will be the top of the bag.

2) Now, at this point, I serged (3-thread) the sides and bottoms of both pieces (6 sides) Leave the top for later. If you don't have a serger, don't freak out. I sewed for a year and a half and made a TON of things- things I sold- without a serger. Serging "finishes" the edges of fabric and allows them not to fray. Find a seam on the inside of any cotton shirt, and you will see what "serging" is. It makes for a finished, professional look. PUL fabric doesn't fray- so it's not a necessity. I serge because I have a serger. I serge because I give a lot of my creations away. I serge because my tag is on the item, and I want it to look nice. A serger is a bonus- not a necessity!
If you're using PUL, you don't need to finish anything because it doesn't fray.
If you are using cotton, I'll give you options for finishing your edges after you stitch the bag together.

 3) Put the good sides of the fabric together and pin the sides and bottom together. PUL fabric doesn't shift very much- so pin every 2-3 inches. Start at the top of one side, and stitch all the way around. If you have a tag, insert it now.


At this point, you have a basic bag! Simple, huh?!
*If you are using cotton and don't have a serger, you'll need choose your option for finishing your edges at this point-
1) do nothing to the edges...the inside will fray and will look messy once it's washed, but if it's for you, and you don't care, no problem. Just leave it alone and head to step 4.
2) use pinking shears and cut the edges. This will keep it from fraying.
3) zigzag stitch around the sides and bottom. Not as clean as the "serged" look, but it does the job just fine.

So, we need to make a casing for the ribbon, and it's done! ...very simple, but there are a few pointers here, so stick with me.
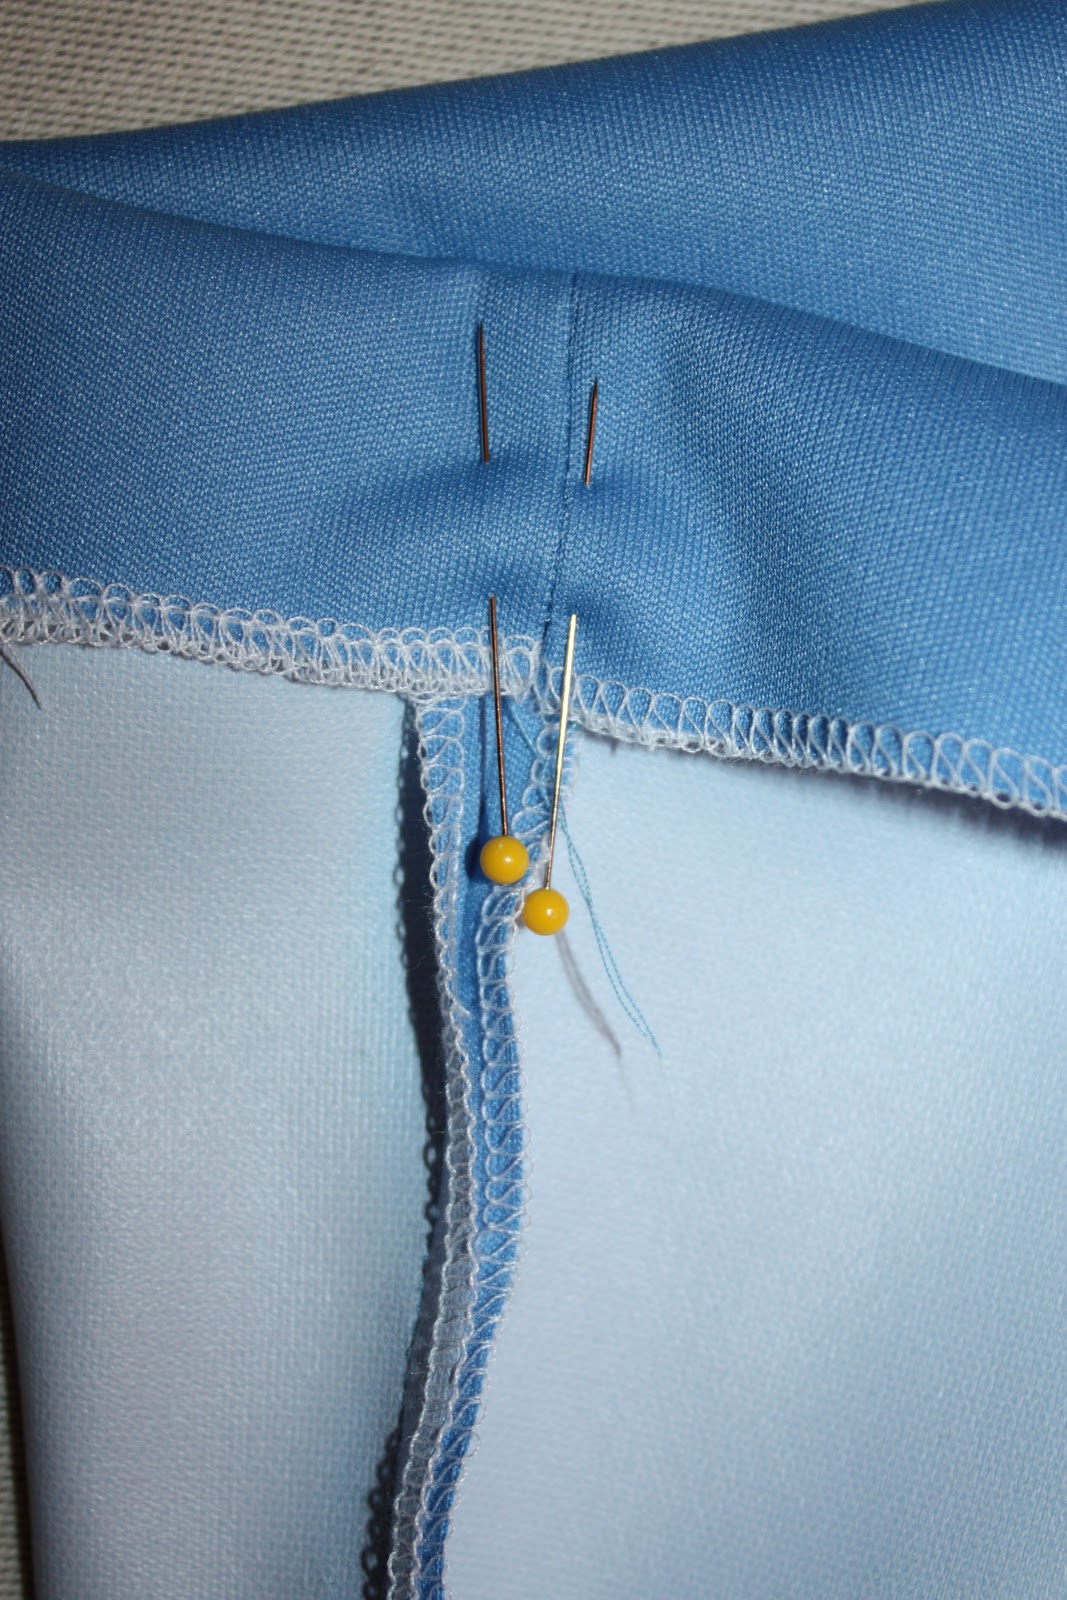
4) If you have a serger, serge around the top edge. I've learned to "secure" the beginning and ending stitches and wish I had a link to post here that could describe how to do it quicker than I could type it! Basically, at the beginning, I do a few stitches into the fabric, keep the needle in the fabric, and lift up the foot. I pull the beginning threads under the foot and under the knife, put the foot down, and continue serging. This cuts off the loose threads and secures them.
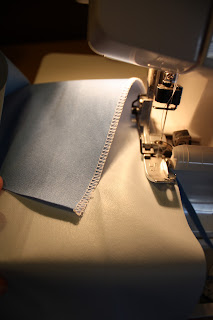
This is the beginning- the edge has no loose threads hanging off.
At the end, I allow the needle to go ONE stitch past the end of the fabric, flip the fabric over and serge back over the last inch or so and let it run off the edge. (Sometimes I turn my knife "off" doing this so I don't cut my stitches by accident.)

This is the end- extra stitches to secure the end and no tail.


So, the top is finished. If you have cotton, just turn under 1/4th inch and turn under again to make your casing. If serged, just lay it down flat.
5) I like to lay the ribbon I'm going to use on top of the casing as I'm pinning to make sure I leave enough room. I used one inch ribbon and made my casing 1.25 to 1.5 inches wide.


***Pointer, as you get to the side seams, make sure you pin the seam "apart." I think if you iron PUL, it will melt (never tried it). Just hold it apart with your fingers and pin well. Don't take this pointer for granted- it will make sense later!***


6) I start stitching at one side seam and go all the way around. I want to make sure the seams lay down flat. I stitch directly in the middle of my serged stitches. Stay close to the edge so you leave enough room for your ribbon!

7) Now, the fun part! Turn your bag right-side out and find the seam you want your ribbon to come out of. CAREFULLY, use your seam ripper and rip the stitches ONLY from the front of the casing... and NOT all the way to the top. I inserted my ribbon to make sure it fit and then stopped.

8) Time to reinforce the opening. Use a zigzag stitch (I used 5.0 width and 1.0 length), and stitch back and forth several times at the top...and then again at the bottom of your opening. (I stitch a few and then reverse stitch a few...repeat again). I know the bag will be opened and closed a MILLION times in its life, so I make sure the opening can take the abuse!


Notice the INSIDE of the casing doesn't have an opening!
Don't rip through these stitches by accident!

9) Ribbon time! I used 33inches of ribbon. Depending on the width of your bag, adjust your length as necessary.
Let me take a second to say that my favorite tool for inserting ribbons is a paperclip. EVERY tutorial I've seen uses a safety pin. After pulling the head off of three safety pins (and poking myself in the process), I've used a paperclip ever since. Just loop it through and give it enough "overlap" to hang on through the casing. Enter and exit through the same hole.


10) Last, but not least, secure the ribbon with a few stitches on the opposite seam. Make sure your ribbon ties are "equal" and simply stitch on top of the opposite seam. This way, the ribbon will never be accidentally pulled out of the casing!


11) I always cut my ribbons on a diagonal to help them not to fray, but I like a little fire, too, so I "heat seal" them as well. I use a long lighter and just pass the ribbon near the flame quickly.

Tie a bow, and you're done! Throw it in your diaper bag, and go make more for your friends!


Happy making and giving!

P.S. This tutorial can be used for ANY size of drawstring bag. I made huge duffle bags for my college-aged cousins one year for Christmas, and they were awesome! I've made tiny bags to hold jewelry. Change the fabric, change the drawstring, change the size, and there are a million uses for this tutorial!