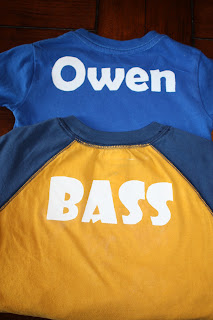
I first saw how do this here. I've been stenciling ever since!
Gather your materials:
*Plain article of clothing: t-shirt, pants, onesie, dress, etc. When I find them at Target or Wal-Mart, I buy several colors in several sizes and hold onto them for the next birthday. 100% cotton is best.
*Reynolds Freezer Paper- I found mine at Wal-Mart on the aisle with plastic, aluminum foil, and wax paper. It's a HUGE roll that will last me a decade! It has paper on one side and plastic on the other. There are a ton of uses for this product, but I'll stick with stenciling for now!
 *Tulip Soft permanent fabric paint- matte or glitter. You can find it at any craft store. (Ask someone for help if you can't find it! They put it in weird places sometimes.) I have white, blue, purple, and silver glitter. I buy shirts that will coordinate well with the colors of paint that I have.
*fun stencil...more on this in a second
*exacto knife
*good cutting surface
*foam brush
*iron
Ok, decide what you'd like to stencil. Names are an easy pick. I also like dinosaurs and animals for little boys. Flowers for girls. Literally, your choices are infinite. Search "coloring page" with the item, and you'll find easy-to-cut-out images on google. Find images that are s.i.m.p.le.- you don't want to be cutting all day!
Print out the name or image and make sure it's a good fit for your article of clothing!
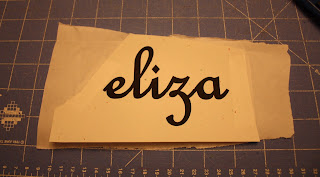
This was the latest stencil that I did- name shirt for Eliza's birthday.
Cut out a piece of Freezer Paper that is a little bigger than your image and tape the image to the top of the paper. Make sure the plastic side is DOWN.
Carefully cut out the image. The goal is to have a perfect NEGATIVE image- the stencil.
**Keep the insides of letters like e,d, a, p, b, etc. You'll need these later! The stencil is ready!
Place the freezer paper stencil on top of the shirt where you want it.
Warm up your iron and carefully press the stencil and adhere it to the shirt. The plastic side of the paper will adhere to the cotton.
**Check the directions on the Freezer Paper box and adjust the temperature of your iron accordingly. I have had my iron too hot and turned the paper brown. You want a good seal so the paint won't leak under the stencil- but you don't want to burn the paper!
Don't forget to adhere the "insides" of the letters during this step!
Check the edges of the stencil, and make sure there's a good seal.
Time to paint! Using a foam brush, apply little amounts of paint at a time. DAB is a good word.
Let the first coat dry and reapply.
Once the paint is dry- and ONLY once it's dry- remove the stencil.
Last step, place a piece of scrap material on top of the stencil or turn the shirt over and iron it.
You want to "set" the paint. (I always read the directions on the bottle to remind myself what to do.)
Nevertheless, your creative, original gift is done!
Fold it, wrap it up, give it away...and go make another one (or two or three)!
Happy making and giving,
braxton


