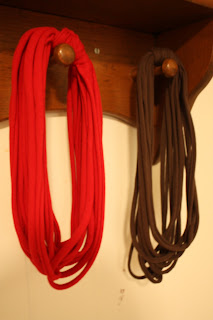
This ended up being my "handmade-with-love" Christmas gift this year. Once I made one, I made a dozen. My husband's t-shirt drawer and Old Navy were my best friends when it came to colorful, affordable t-shirts!
Seriously, this is an easy, no sew project! You need a shirt, a ruler, and some scissors.
I couldn't make just one, and I hope you can't either!
How to pick your shirts-
Solid and bright colors are the best picks because these are going to accent your outfits- but white, gray, and brown can go a long way and match a variety of outfits. A tie-dye is great if you can get your hands on one!
Also, try to find shirts with NO side seams. If they are there, it's okay, but you will have less options on how you want to wear it. Side seam shirts are just fine- if it's a great color, do it!
Gather all your materials:
*shirt
*scissors (or rotary cutter if you have one)
*a yard stick or ruler
*cutting mat, if possible
Ready, set, go-
-Lay the shirt flat on the cutting mat or table.
-Cut the hem off.
-Working from the bottom of the shirt to the armpits, make cuts every 3/4ths inch up to 1.5 inches parallel to the bottom of the shirt. You are basically cutting your shirt into thin circles.
-You can vary the widths in your necklace or make them all the same. I did both and liked the different looks. Most of my loops were one inch thick.
Now, the fun part!
You are going to take each loop of fabric and pull it until the knit loops up on itself and turns into a rolled, long loop of knit.(about 1/8th" thick now)
Let me add a side note- I ran into a crazy shirt that did NOT roll up into a loop once I pulled it. The loops stretched...but never rolled. I don't know why and never tried too hard to find out because I loved the look. I've worn it more than any of my others! If you get a "lemon," just work with it!
 |
| The loops are still about 1" thick. Crazy, but I love it! |
Next is the "creative" part. Decide how many loops you want in each necklace. Mine were 8-15 loops each. Keep in mind that you will wrap the loops around your neck twice...so it will become twice as thick. (Mine were 16-30 thick once "arranged" on my neck.) You should be able to get about 15 cuts from each shirt...so, one shirt can make two necklaces if you use 7-8 per necklace. Sometimes I used 12 loops and just threw the extra loops away... or paired them with another set of loops for a multi-colored look.
 |
| Wrap it around your neck twice for a shorter, thicker necklace |
 |
| No-seam necklaces are LONG! |
Let's finish it out!
Cut one more piece of 1" shirt and wrap it around all the "stacked" seams til they are all covered.
Tie a nice knot and tuck in the end pieces.You can stretch this piece as well or leave it wide.
Give it away...then, go make yourself one!


No comments:
Post a Comment