
I had this ingenius idea about two years ago that someone should invent monogramming for Pyrex... for all the newlyweds in the world who wanted their cute initials or name on their glassware. Seriously, I see EVERYTHING monogrammed these days- why not Pyrex?! I saw an even greater need as we started feeding our friends after they delivered. They would have stacks of Pyrex to give back and sometimes didn't know whose was whose. Sticky notes ended up being the solution.
And then Pinterest came along! And one day as I looked through pins, I saw it! "Glass Etching for Pyrex," and I went shopping the next day! No more sticky notes, people! This is the real deal!
I have etched five of my own and have worked out the kinks. I'm doing some for a friend who's giving them as Christmas gifts and will take you through the process. Here goes!
First thing, you'll have to go shopping and probably scrummage through your craft drawers for random items. But $15 should get you started.

You'll need:
* "Armour Etch"- glass etching cream. I got 3 oz at Hobby Lobby for $9. (You can find it all over the internet and in various amounts.) I had to ask where to find it, but a nice gentleman took me straight to it. This stuff is SERIOUS! Be very careful handling it, washing it off, and having children around. It burns glass- enough said!
* Adhesive vinyl- I also had to ask where to find it at Hobby Lobby, but they had plenty. Color does not matter. My roll is 9" wide by 10 feet. I have enough to do 100 dishes- give or take a few. There's a grid on the back which makes cutting very easy!
* small exacto knife- if you don't have one of those awesome machines that will cut the vinyl for you (I don't), you will be cutting your letters by hand. The smaller the blade, the more precise the cuts.
* cutting mat or board- do not take for granted that you need one! (My kitchen island has several outlines of letters from a time when I wasn't thinking clearly!) I use my Rotary Cutting Mat (17" x 23") for all my sewing cuts. If you want to start sewing...go get one!
* new foam brush- I have a huge pack of them in my craft drawer because they are cheap, and I use them for all sorts of stuff! When you get done with it, THROW IT AWAY! Etching cream is no joke! (have I said that already?)
* any size Pyrex- I have etched onto clear and blue Pyrex...flat and round ones. The dishes I will be working on for this project are 8.5x7x2"tall and a 9x13x2" tall.
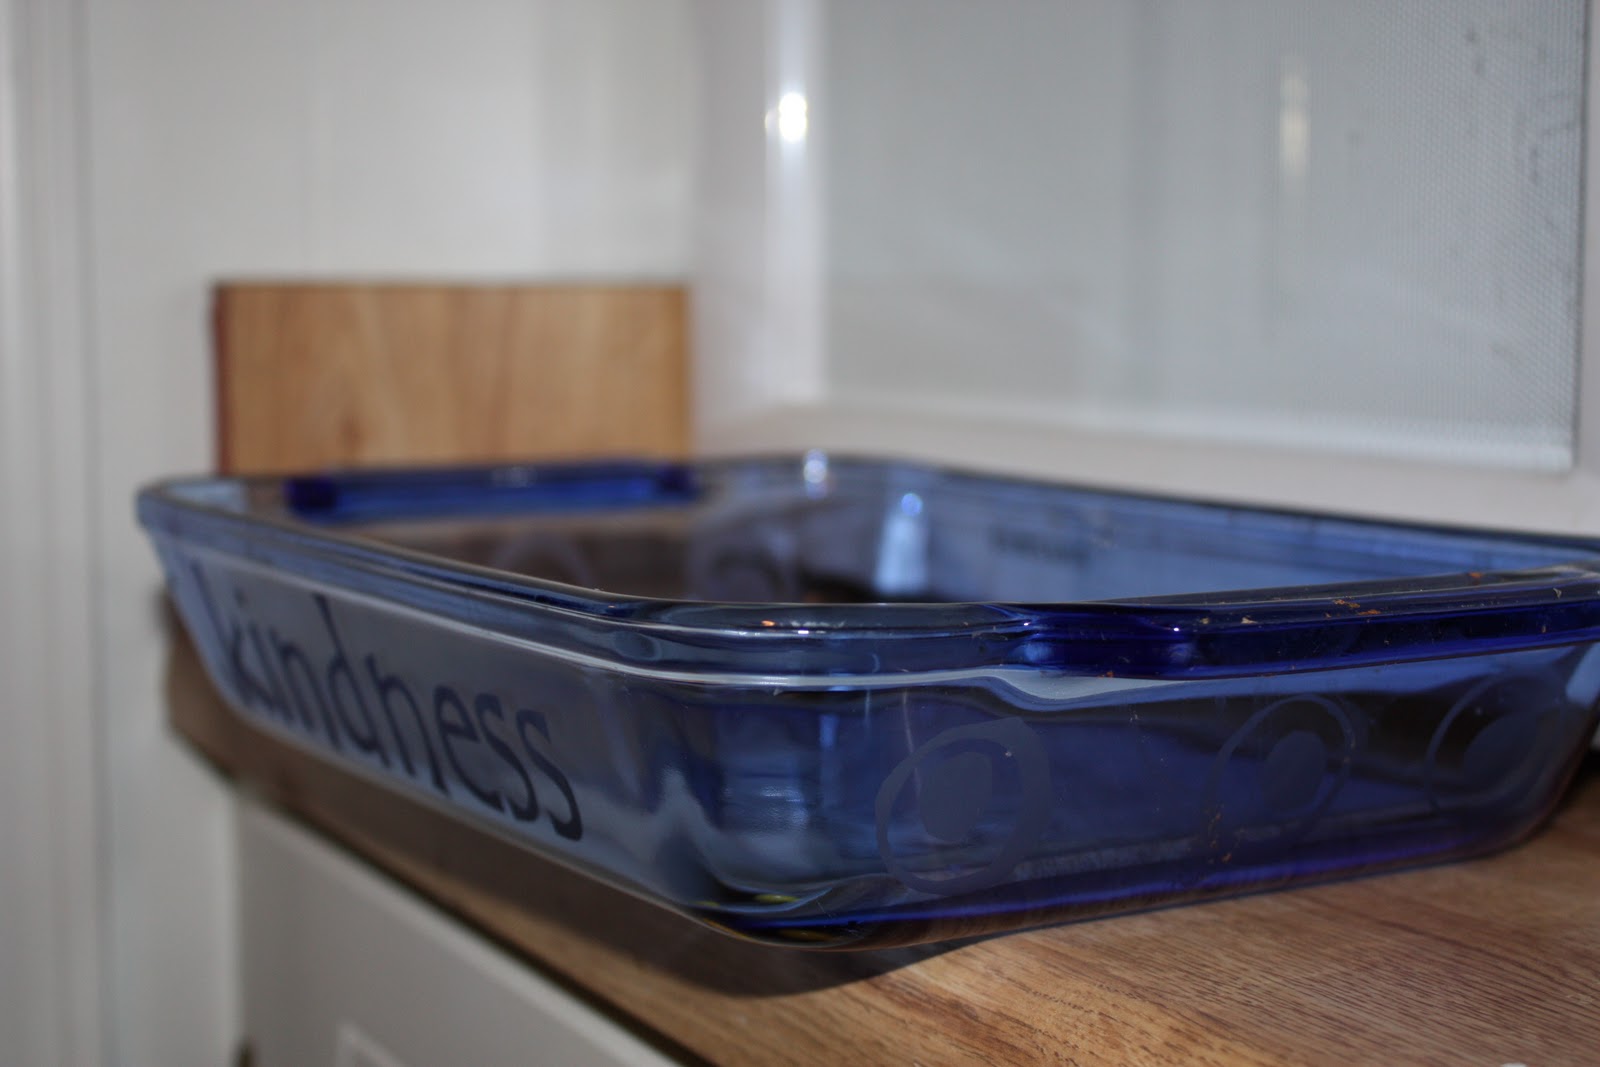
Once you have all your materials, you're ready to decide what you want to etch. I etched my last name on the first dish I did- and then decided it would get a little boring if all I saw was my name. I decided to use "faith" and "blessings" plus the fruit of the spirit- love, joy, peace, patience, kindness, goodness, gentleness, and self-control along with some free hand circles.

Find a font that you like and make sure it is big- but not bigger than 1.75" tall when printed. I used Tempus Sans font at 140 or 120.
Cut a strip of vinyl 2.5in tall (6 little squares if you look on the back), and tape your word on top of the vinyl.

Carefully, begin to cut out your letters. You are cutting through 3 layers- paper, vinyl, and paper backing, so use slow, heavy cuts. Take your time and be precise. You want a perfect NEGATIVE image when you are done. (You will throw the letters away- the SPACE is what you want.)

You can tell the "dot" on my i is off- but tempus sans puts it at a funny place to me.
Anyway, when you are done cutting, take all the letters out and you are left with your stencil.
**Don't lose the "inner" parts to letters like e and a. You will need them!**

Now, you are ready to center your stencil and carefully adhere to it the glass. There is paper that you can buy to help transfer it once you take the paper backing off. You can also use contact paper. I've done it without both- it just takes a little more patience.
 |
| I start from the center and adhere from center to each end. |

**This is a good place to stop if you need to...or go ahead and print, cut, and seal another dish that you want to etch. Once you put the cream on, you will need to wait a good 20 minutes and then wash it off and clean up the sink and brushes. I will cut and seal all four dishes. Tomorrow, I will put the cream on. I will waste less cream doing them at the same time.***
Whenever you have cut and sealed all the dishes you want to do, you'll want to find a way for your dishes to stand UP while they are being etched with the cream. I use a highchair for the small ones and smush the big ones between a shelf and my sewing machine. A chair that leans back will also work. Figure this out before you put the cream on.

At this point, make sure you have about 30 minutes of uninterrupted time. Apply the cream using a foam brush. I "blot" the cream on instead of "brushing" it on. Make sure EVERY bit of the space you want etched is covered. Go up and down and side to side if you need to. *Be careful to not get any cream outside of the vinyl area! Wipe off with a cloth immediately if you do.* And, please be careful with the cream. The bottle says to use gloves and apply in a well-ventilated area. I'm not this careful, but I wash my hands THOROUGHLY after applying and washing it off the dishes. This stuff is dangerous!
I check back after 10 minutes and make sure there aren't any spots that I missed. I missed a few spots on the first dish I ever did, and I can tell. So, double checking is a good idea. Once all cream is on, set a timer for 20 minutes. (I was doing 5 dishes at once so I did the first three, set the timer, and then waited 10 minutes to start the other two. I wanted to have enough time to wash dishes before the second set were done.) I rinse the brush after applying and leave it on a papertowel next to the sink because I use it to wash off the cream. It is then thrown in the trash!

Once the timer beeps, I take the trash can to the sink (for the vinyl) and scrape the cream off with the foam brush under running water. I continue to let the water run over the dish as I take the vinyl off. Immediately throw the vinyl in the trash.


Take a picture and post it on Facebook to show all your friends what you can do!
(Link to this tutorial so they can do theirs, too!)

Happy making and giving!
-braxton

Hahaha a way to monogram nice one!-etched glass-
ReplyDeleteLove reading your DIY Etched Glass making as well as your emphasis on safety of handling etching cream.
ReplyDeleteThank you for showing us step by step. Have you etched over the Pyrex letter?
ReplyDeleteI tried three Pyrex pie pans today, and the cream did nothing at all. It was on for way more than 20min cause I had lunch before checking. I still have the vinyl stencils stuck on hoping I can try again or pain them or something.
ReplyDeleteI tried three Pyrex pie pans today, and the cream did nothing at all. It was on for way more than 20min cause I had lunch before checking. I still have the vinyl stencils stuck on hoping I can try again or pain them or something.
ReplyDeleteI tried three Pyrex pie pans today, and the cream did nothing at all. It was on for way more than 20min cause I had lunch before checking. I still have the vinyl stencils stuck on hoping I can try again or pain them or something.
ReplyDeletesometimes inexpensive glassware at the dollar store works well. I started with wine glasses first
ReplyDelete