
And, please let me teach you how to make one!
The Dirty Bag is a basic drawstring bag...with a twist! My bag is made from PUL fabric. PUL fabric is used to make cloth diapers and is fabric laminated with a waterproof backing. You can find it at specialty fabric stores, and I know Hobby Lobby and Jo-Ann Fabrics have just started selling it as well. There are solid colors to choose from as well as prints. (approx $12/yard)
The first Dirty Bag I made was from a used diaper pail liner. I cut a rectangle from the bottom corner, closed the last side, made a casing, inserted a ribbon, and I had a waterproof bag to hold soiled cloth diapers in my diaper bag. I made three more the next day and gave two away! The mom I gave them to didn't use cloth diapers. She wanted a bag to keep dirty bibs, spat-on burp cloths, and soiled underwear in from her toddler! My bags have held all of these things as well as wet bathing suits and "blow-out" outfits. The uses are endless!
That is why this has become my go-to baby shower gift! EVERY mom needs at least one of these! I know it will be used from birth to age...5? at least :)
So, Elizabeth, after having three boys, you are finally getting a Dirty Bag for your fourth! It's about time!
Let's get to it~
You'll need half a yard of fabric. Obviously, I recommend PUL fabric, but if you don't need a waterproof bag, cotton will do the job.
1) This bag was cut 12"x16"... cut whatever size you want. 14"x16" gives you a wider, more squared bag...just "eye" the fabric and find the size you want.
 |
| Cut two pieces the same size |
The shorter side will be the top of the bag.
 2) Now, at this point, I serged (3-thread) the sides and bottoms of both pieces (6 sides) Leave the top for later. If you don't have a serger, don't freak out. I sewed for a year and a half and made a TON of things- things I sold- without a serger. Serging "finishes" the edges of fabric and allows them not to fray. Find a seam on the inside of any cotton shirt, and you will see what "serging" is. It makes for a finished, professional look. PUL fabric doesn't fray- so it's not a necessity. I serge because I have a serger. I serge because I give a lot of my creations away. I serge because my tag is on the item, and I want it to look nice. A serger is a bonus- not a necessity!
If you're using PUL, you don't need to finish anything because it doesn't fray.
If you are using cotton, I'll give you options for finishing your edges after you stitch the bag together.
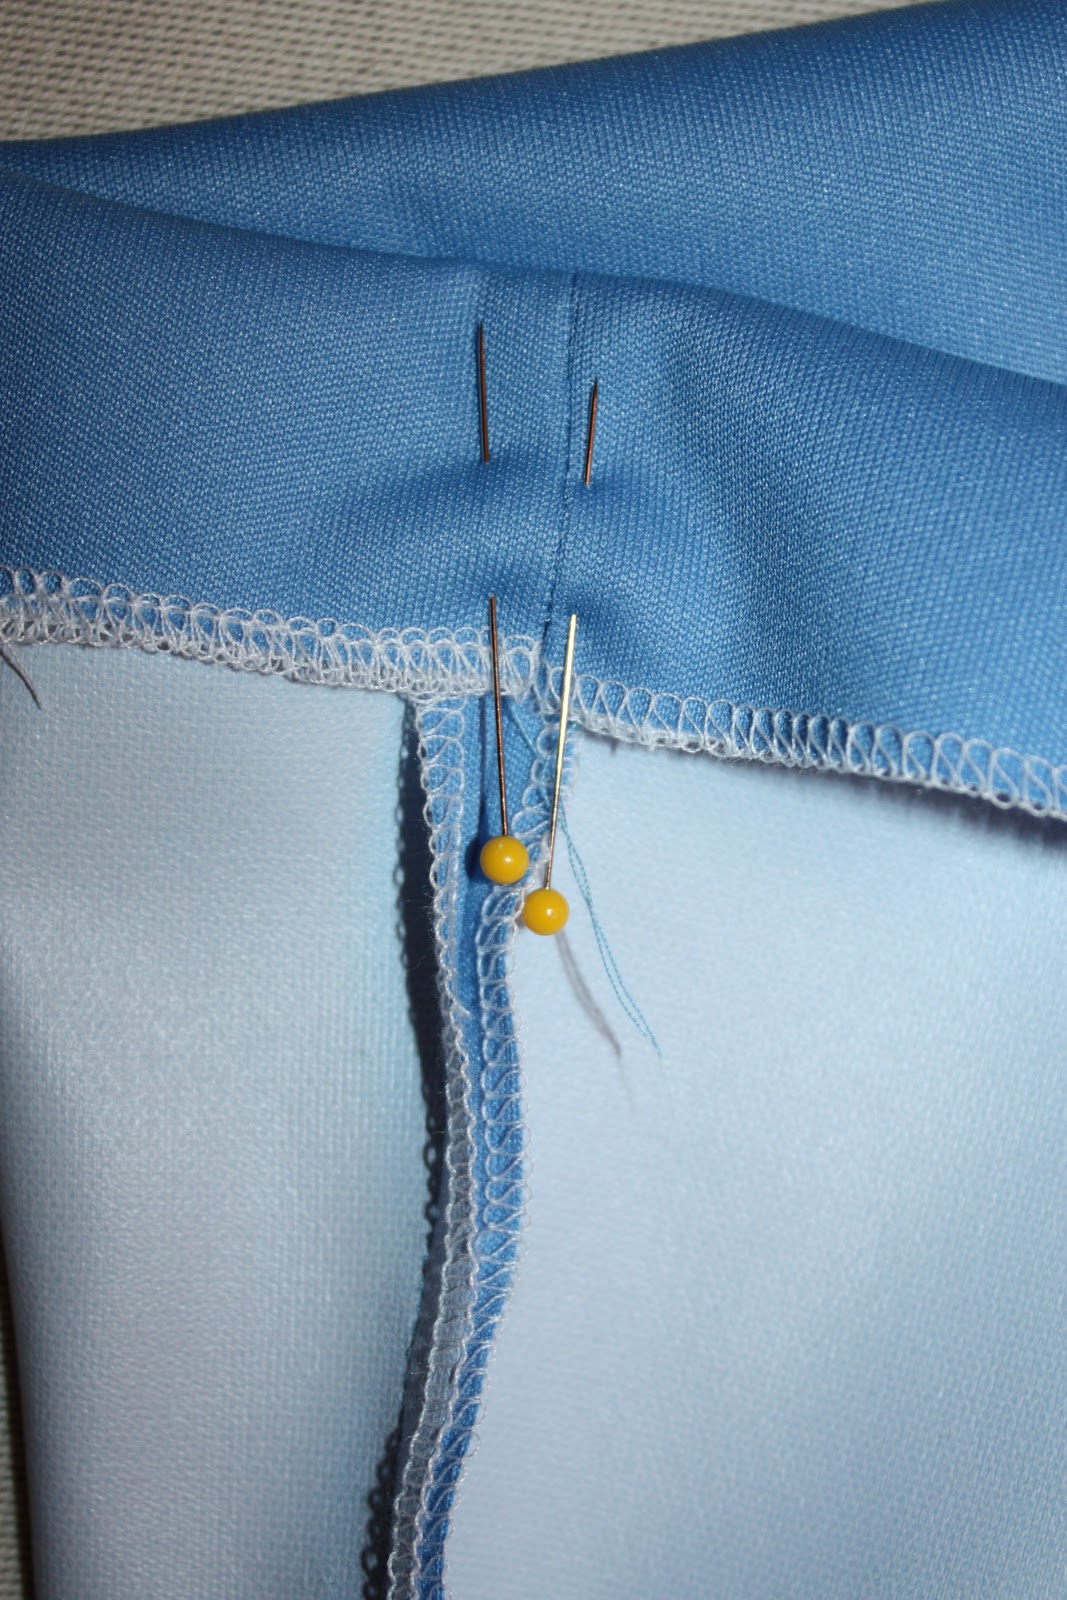
 3) Put the good sides of the fabric together and pin the sides and bottom together. PUL fabric doesn't shift very much- so pin every 2-3 inches. Start at the top of one side, and stitch all the way around. If you have a tag, insert it now.
At this point, you have a basic bag! Simple, huh?!
*If you are using cotton and don't have a serger, you'll need choose your option for finishing your edges at this point-
1) do nothing to the edges...the inside will fray and will look messy once it's washed, but if it's for you, and you don't care, no problem. Just leave it alone and head to step 4.
2) use pinking shears and cut the edges. This will keep it from fraying.
3) zigzag stitch around the sides and bottom. Not as clean as the "serged" look, but it does the job just fine.
So, we need to make a casing for the ribbon, and it's done! ...very simple, but there are a few pointers here, so stick with me.
4) If you have a serger, serge around the top edge. I've learned to "secure" the beginning and ending stitches and wish I had a link to post here that could describe how to do it quicker than I could type it! Basically, at the beginning, I do a few stitches into the fabric, keep the needle in the fabric, and lift up the foot. I pull the beginning threads under the foot and under the knife, put the foot down, and continue serging. This cuts off the loose threads and secures them.
 |
| This is the beginning- the edge has no loose threads hanging off. |
At the end, I allow the needle to go ONE stitch past the end of the fabric, flip the fabric over and serge back over the last inch or so and let it run off the edge. (Sometimes I turn my knife "off" doing this so I don't cut my stitches by accident.)
 |
| This is the end- extra stitches to secure the end and no tail. |
So, the top is finished. If you have cotton, just turn under 1/4th inch and turn under again to make your casing. If serged, just lay it down flat.
5) I like to lay the ribbon I'm going to use on top of the casing as I'm pinning to make sure I leave enough room. I used one inch ribbon and made my casing 1.25 to 1.5 inches wide.

***Pointer, as you get to the side seams, make sure you pin the seam "apart." I think if you iron PUL, it will melt (never tried it). Just hold it apart with your fingers and pin well. Don't take this pointer for granted- it will make sense later!***
6) I start stitching at one side seam and go all the way around. I want to make sure the seams lay down flat. I stitch directly in the middle of my serged stitches. Stay close to the edge so you leave enough room for your ribbon!
7) Now, the fun part! Turn your bag right-side out and find the seam you want your ribbon to come out of. CAREFULLY, use your seam ripper and rip the stitches ONLY from the front of the casing... and NOT all the way to the top. I inserted my ribbon to make sure it fit and then stopped.

8) Time to reinforce the opening. Use a zigzag stitch (I used 5.0 width and 1.0 length), and stitch back and forth several times at the top...and then again at the bottom of your opening. (I stitch a few and then reverse stitch a few...repeat again). I know the bag will be opened and closed a MILLION times in its life, so I make sure the opening can take the abuse!

 |
| Notice the INSIDE of the casing doesn't have an opening! Don't rip through these stitches by accident! |
9) Ribbon time! I used 33inches of ribbon. Depending on the width of your bag, adjust your length as necessary.
Let me take a second to say that my favorite tool for inserting ribbons is a paperclip. EVERY tutorial I've seen uses a safety pin. After pulling the head off of three safety pins (and poking myself in the process), I've used a paperclip ever since. Just loop it through and give it enough "overlap" to hang on through the casing. Enter and exit through the same hole.


10) Last, but not least, secure the ribbon with a few stitches on the opposite seam. Make sure your ribbon ties are "equal" and simply stitch on top of the opposite seam. This way, the ribbon will never be accidentally pulled out of the casing!

11) I always cut my ribbons on a diagonal to help them not to fray, but I like a little fire, too, so I "heat seal" them as well. I use a long lighter and just pass the ribbon near the flame quickly.
Tie a bow, and you're done! Throw it in your diaper bag, and go make more for your friends!
 |
Happy making and giving!
P.S. This tutorial can be used for ANY size of drawstring bag. I made huge duffle bags for my college-aged cousins one year for Christmas, and they were awesome! I've made tiny bags to hold jewelry. Change the fabric, change the drawstring, change the size, and there are a million uses for this tutorial!
No comments:
Post a Comment